Posts

Showing posts with the label unity

Unity tutorial 9

Image
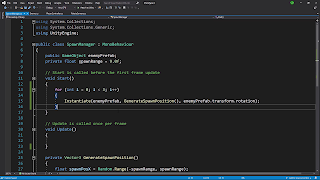
an example of my code  In this weeks unity tutorial I learned how to create a game where you control a ball that will go into your enemies net and the enemy will try to do the same to you. I also learnt how to spawn waves of enemies using the spawn manager. I acheived this by using C# scrips. The first tutorial I did this week was a particularly challenging one because there was not as many insructions given with it so I had to use my skills that I have learnt over the last few weeks to complete it. It was very satisfying to do this as I can see that my skills and understanding of unity have grown so much since I started.

Unity week 7

Image
A screenshot of my C# code  In this weeks tutorial I learned how to create more realistic animations in my game and how to add particle effects and sound effects to my game. This tutorial will be helpful for when I go onto developing my own game because of how I can now make more visually realistic effects in my games. Making the character look more like they are actually running makes the game appear more polished which is something that I would like to achieve with my game. Although basic elements like functional code is important I would argue that this extra layer of polish is important because it makes the games look more put together and more complete. 

Week 6 Unity tutorial

Image
Screenshot of my C# script  In this weeks unity task I learned how to make the background of my game move by as the game is being played. I did this by using C# code to make the background repeat in order to look like it is continuously moving as the game is being played. This method will be helpful when it comes to creating my game if I choose to use this kind of background. I found this tutorial very interesting because I always wondered how this was achieved while I was playing games. 

Reading week unity task

Image
Screenshot of my C# code   In this weeks Unity tutorial I continued to work on the prototype that I began last week and I also began to work on another prototype where I added music and sound effects to the prototype. In the first task I added new elements to my game from last week. I used C# to create a new way of spawning the animals, instead of spawning them by using the S key I instead used C# to spawn them by using a timer. Every few seconds an animal will spawn in the game. In this tutorial I also learned to add collision to the animals in the game so they will react when they collide with each other. In the second unity tutorial I learned about adding music and sound effects to the games that I create. This will be incredibly beneficial to me when I am creating my own game because of how important music and sound effects are to setting a mood in a game.

Week 5 unity tutorial

Image
Screenshot of my prototype  This weeks unity tutorial involved me starting a new project. This project focuses on a game with a more defined goal. My first prototype was a very basic game with no win or lose state and very minimal features. This project is more advanced and it better represents a finished game. This tutorial began by covering basic player movement which includes moving left, right, forward and backwards while also insuring that the player character stayed within the bounds of the playable space in the game. I then learned how to make the player character throw the piece of food using the spacebar, I did this by using a C# script. I then went onto learn how to make the animals spawn when the S key is pressed and to then change the perspective of the camera when the animals spawn in. 

Unity tutorial 2

Image
An example of my C# code  In this weeks unity tutorial I added more advanced techniques to my unity project. I learned how to make my vehicle move from left to right in addition to moving forward. I did this by adding more advanced C# code to my project. I also learned how to adjust the speed of the vehicle by using C# code. This more advanced C# code has allowed me to make my project a much more functional game and more entertaining to play because of that. These more advanced techniques will benefit me when I go onto developing my own game.

Unity tutorial 1

Image
A screenshot of my unity project  This week I began my first unity tutorial, I had no previous experience working in this program so this was a new experience for me. In this tutorial I learned how to create a 3D engine and build the beginnings of a 3D game where you control a car. This tutorial covers the basic elements of unity like setting up and editing a C# script, adding scripts to an asset, controlling a camera and other basic elements of unity. This tutorial really helped me in getting a grip of unity and learning more about the program. I'm looking forward to continue with my unity tutorials and to go onto using the skills and tips I learned in these tutorials when I go onto developing my game